Showing posts with label Before and Afters. Show all posts

Tuesday, April 5, 2016

Before and After: A Client's Family Room

I started working with my client from Philadelphia last year and we recently progressed from working on her family room to working on her kitchen.

When we started on her family room, her budget was tight.  We had to work with her existing furniture and there was not a huge allowance for new fabrics, pillows and such.

We've also changed directions in regards to the design of this room……in the end, she found her style and knew what she wanted.

The biggest impact areas I saw were changing the wall color and investing in window treatments.  She did both.

She painted her entire great room a new color and actually sewed the window treatments for her large window wall.  Can you believe that??

She wasn't sure about installing woven shades, but after some convincing, I'm glad she did, because they make all the difference.  She loves how finished and cozy the room now feels.

Client's Photo (not professional)

Above, you can see how the room looks like today.

She recently told her husband that she finally feels comfortable in their home and how much she truly loves it.  They are a young family with two toddler boys.

As part of my design consult, I recommended that she:

1. Invest in a new media console
2. Hang her flatscreen on the wall
3. Place a sofa table behind the sofa (against the window) to add some depth/interest to the window wall
4. Purchase large gourd lamps to go on sofa table
5. Add a round end table to connect the two sofas and break up the hard lines.
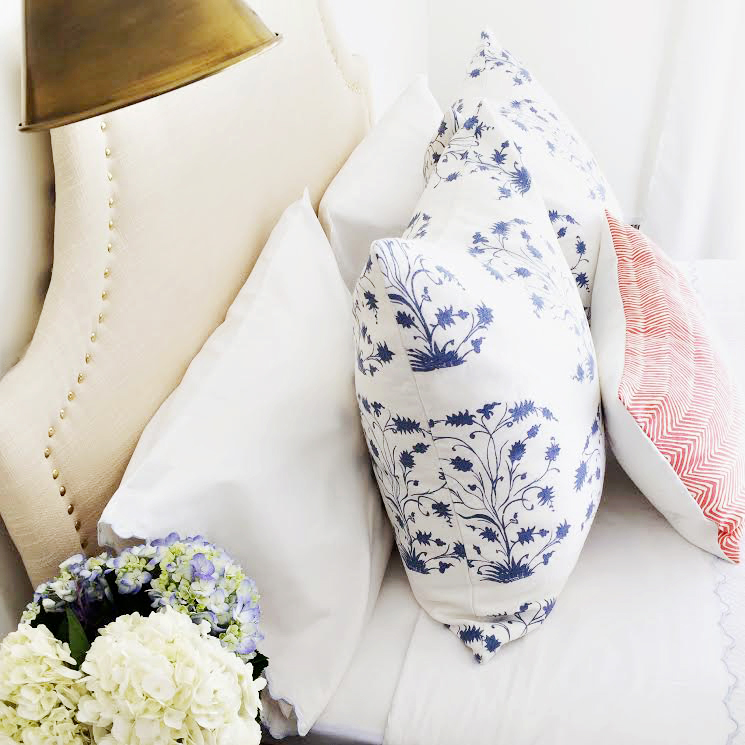
6. Lots of light colored pillows to break up the leather sofas which she did and chose all by herself
7. Paint walls lighter and brighter color
8. Add window treatments and woven shades

She has done an amazing job!!  And, just to emphasize where we started.  Below is the before picture when we started working together.  Notice the large blue painted window wall - so happy that no longer  looks like that!


She has come such a long way and has been such an incredible client.  I can't wait to show updates on her kitchen when it is all said and done!!  They say the greatest form of flattery is when a client you love working with asks you again to help them with a new space! I couldn't agree more and am certainly grateful!!

If you need help decorating a room, feel free to contact me!

Thursday, November 12, 2015

ORC: Week Six - Final Reveal

I can officially say that I have completed Linda's One Room Challenge and survived to tell about it!!!  I might've neglected my family, our pet fish and the house for the past week, but I am very, very happy with the outcome!!  AND I can also officially say (and my husband will agree) that our guest room is soooo much nicer than our master bedroom - and there is something completely not right with that!

I am happy to share it with you.  Here is my guest room reveal….


Those beautiful brass nailheads caused a couple of gray hairs and took so painstakingly long.  For every one I got right, I ruined about twenty.  No joke.  But, it worth the hundreds I saved from buying a new headboard.  


If you remember, below is a picture of our guest room BEFORE:


And, this is our guest room (and which also pulls double duty as my office) AFTER:


Below is a snapshot of my huge homasote DIY bulletin board that also serves as my catch all inspiration and design planing board. 


And, my little desk below surrounded by all the many things I love and treasure.  


For those of you who have followed along, thank you so much for sticking with me!  This was a great challenge for me personally and professionally!  If there is enough interest, I'd be happy to put a blog post together about my DIY headboard.  I think I spent approximately $180 in materials and supplies at the end of the day. 

If you are just tuning in, I've just spent the past six weeks participating in Linda's One Room Challenge and you are welcome to read more about my guest room's transformation during the previous weeks here.   Thank you Linda for hosting my first ever ORC.  Hop over here to see the other participants and their crazy transformations. 

Also, I'd like to thank Nicole Pullen who helped me with the photography! She is based in Louisville.

Sources are listed below.


Friday, November 14, 2014

E's Bedroom - Finally the Reveal!

In approximately two weeks, we will have lived in this house and in Louisville, KY for one year!  Woohoo!  I can't believe how fast the time has gone. When we first moved into this house, one of the first rooms I was determined to work on was E's room.  For the past three years, the poor girl has not had a proper room!  When we lived in Vienna, her bedroom was a large walk-in closet (with a huge window), but still, it was a closet.

So, I set forth designing her room with gutso.  If you remember, this was the inspiration board I created for her room.


I mainly stuck to the plan, but had a departure here or there as things got underway.  Here is her room now and I am happy to say that my little E loves it (and so do I)!


The window is the first thing you see when you walk in the room and I wanted it to be the focal point.  I picked a neutral buffalo check fabric and had it made into a custom balloon shade that will grow with her as she transitions to a big girl room and so on.  I painted the walls a soft cream to complement the biscuit color in the buffalo check fabric.


I had a scalloped slipcover made for an old glider we had in a white matelasse fabric and created a cozy reading nook.

The framed watercolor above the chair is of the town my mom is from and grew up in - Trier, Germany.  The watercolor was given to us from my mother's family as a wedding present.


The book shelf is actually an Ikea Hemnes bookcase that I painted BM Prescott Green.  I LOVE this color.  Painting the bookshelf wasn't part of the original plan, but as the room progressed I felt it needed a cooler color to offset all the warm tones.  I am so happy how it turned out.


Here are some close-ups of some of the really special things on her bookcase.  


We love reading Little Bear! 

The mirror below is from Target that I whitewashed.  My blue and white lamp is from my step mother and dad given to me for my birthday which I love.  And, her monogrammed baby cup is from her grandparents.  


The dresser below is from Restoration Hardware which I am very happy with and I love how the gray tones work well with the cream walls. 


E just turned 3 and will be transitioning out of her crib soon.  This was previously Luke's crib.  Her crib is very simple nothing fancy, but I love the bolster and touches of blue.  The bunny plates above her crib are my favorite and I had them custom made from etsy. The picture below was taken at a different time so the lighting is a bit off.  The walls and fabric are much more saturated.  


Below is my husband's rocking chair when he was a little boy and I had a custom toile slip made for it. I found the hooks at an antique store and painted them BM Prescott Green.  That is Peanut sitting in the rocking chair! 


E's grandmother made her tooth fairy pillow hanging on the peg hooks.  


So, that is it!! It was a labor of true love as I guess all children's rooms are!  If you are interested in seeing this room when we bought the house, see below.

BEFORE:


Yes, those are some really purple walls!!  I hope you enjoyed my little girl's room and have a wonderful weekend!!

Friday, February 1, 2013

From eeewww to aaaahhhh....

The other day my friend sent me before and after photos of her hall bathroom.  She lives in a rental in Manhattan so she is always looking for quick fixes that don't involve huge renovations.  She wanted a to make her "ugly" (her words) bathroom into something a bit more appealing.

Before

A couple of rolls of Anthropologie wallpaper  (50% off) and here you go....

After

An easy, inexpensive fix with lots of impact.  She specifically chose this wallpaper so that it could tie in her yellowish greenish ("ugly") tiles.  That is taking lemons and making lemonade.  Also, she said that it had this sure strip backing (paste-free application) making it easy to put up.

Here is a blow-up of the wallpaper design:


Pretty, huh?  I know these days it is easy to get overwhelmed with all the gorgeous design pictures flying around pinterest.  Some days I think I need tons of money to do a complete reno (gut) job to get the room I want. I just am really impressed how my friend used what she had and worked with it.  I think those are some of the most challenging design jobs!!

Happy Weekend Friends!

Friday, June 15, 2012

A Bright Face Lift

In three short weeks, we will be flying to Connecticut to do our house hunt.  This will be an intense house hunting trip - four days with the hopes of flying back with contract in hand.  I'm preparing for our trip by making a list of our 'must see' houses.  In the meantime, I'm seeing a lot of ugly out there!!  Dark paneling, no light, low ceilings, etc.

I stumbled on this oldie but goodie renovation that was published in Southern Living a while back.  And, I think it a great before and after story....

Family Room Before:


Family Room After:


Kitchen Window Before:


Kitchen Window After:


Eat in Kitchen Before:


 Eat in Kitchen After:


Kitchen and Family Room After:


Before and After Floor Plans:


Amazing, huh?  Now, I don't think we're up for quite a big renovation project like this one, but it does get you thinking of the endless possibilities, doesn't it?  To see full article, go here.  

Hope everyone has a great weekend!!

Monday, September 19, 2011

Before & After: DR Sideboard

With all the craziness, I've been slow to post some of my finished projects.  And, once the baby arrives (due this Sunday) I know I won't have time.  So, here is the sideboard I found at a tag sale for $25.

BEFORE (Post Sanding)


It wasn't the best quality, but it was the perfect size for our small dining room.  If you remember from this post, I decided to paint it BM Pale Avocado and add this hardware.


I haven't hung my antique gold federal style (eagle) mirror above the sideboard because we're moving in less than a month and I really don't want to put new holes in the wall.  So, here is the sideboard now.

AFTER


The other day, I placed my mirror on the sideboard to see how it would look.  I'm dying to hang it - I think it would go perfectly above the sideboard.  

AFTER

I found that mirror at an antique store for $45.  I love it.  The sideboard has a collections of items which I love and found at various places.  I know my orchid looks in bad shape;  I can not for the life of me keep orchids alive.  

And, do you spy some DwellStudio Gate Citrine fabric in the reflection of the mirror?  More on that tomorrow - I will reveal my dining room (as it currently stands) and will show you what an awesome job Melissa from Windows by Melissa did on my roman shades!    Stay tuned!

Monday, August 22, 2011

Our Newly Renovated Bathroom

I wanted to post this earlier, but we had five showings and an open house since Friday and I literally was running around like a crazy woman.  Of course, wouldn't you know, I can't find our before pictures!  But, our upstairs bathroom was rough - really rough.  The kind that hasn't been updated since the 1940's (when the house was built).  I did manage to find some pictures mid renovation.


We had a sink that just jutted out from the wall like the ones you see in a jail cell.  No joke.  We had a gross medicine cabinet with two ugly sconces.  We removed them and took them immediately to the dump.  We had an awful ceiling with a huge crack and peeling paint.  My husband tore out the existing ceiling and installed a vapor barrier followed by beadboard, made by Nantucket Beadboard.  We used their MRI product, which is a premium grade moisture resistant fiberboard.  We primed and painted it with mold/mildew resistant semi-gloss paint (even along the edges, after they were cut to size).  Here it is, partially installed.


The floors were covered with individual square vinyl tiles - how lovely.  And the plywood around the toilet was delaminating (breaking apart) after 60+ years of condensation around the toilet.


My husband did all the flooring.  He tore out the baseboards, the laminate tiles and cut out the plywood subfloor.  He installed a new cement board sub-floor.  I chose the tile and decided on the Daltile's porcelain hexagon tiles 2"matte white which came in square mesh sheets making it a tad easier to install.  We grouted in delorean gray.  Here's the floor post-tile but pre-grout.


We kept our existing tub and just had it resurfaced which ended up saving us a good deal of money.  Our shower/tub walls had been one of those cheap plastic inserts (ack!).  He tore that out, as well as the drywall behind it.  Up went more cement board, which provided the foundation for our tiled shower walls.  


And, now the afters!


The walls are painted SW Nonchalant White which is a subtle green.  We purchased the Del Mar 36 inch wide vanity cabinet which ended up being a perfect fit for this very narrow bathroom.  It is only 12.5 inches deep.  I love the toilet - it's a kohler.  


I can't remember where I bought the sconces, but I purchased the mirror from Lowes.  It was hard to find a narrow mirror and this one came with oil rubbed bronzed brackets which I spray painted chrome.  


My DIY greek roman shade which I love.  


Here is the beautiful subway tile.  I love how clean and bright it looks.  I bought a tension rod from Target because we didn't want risk drilling into the tile right before we put the house on the market.  It has held up pretty well and I don't think you can immediately tell that it is a tension rod. 

It was hard to capture a full on picture because our bathroom is so small and narrow, but I hope you got the jist of it.  I am very happy how everything turned out given our resources.  What do you think?


Thursday, July 28, 2011

Before and After: Painting Over Wallpaper

Thank you for your kind comments about our dining room saga.  Some of you asked if the color on the furniture complemented the color on the walls - it kind of doesn't.  The color palette in the room is cream/gray/citrine and now I have these stark white chairs and table.  It sticks out like a sore thumb.  Anyway, I'm trying to see if I can hijack a highschool student to help me repaint them!! 

Anyway, before we painted, our dining room had wallpaper.  Actually, it still does.  But now it just has paint over it! :)  The wallpaper was there before I moved in and it is just not me.  See below.


I find the stripes overbearing for our small dining room.  So, let me tell you 3 reasons why I chose to paint over the wallpaper instead of taking the wallpaper down.

1) Condition of walls.  The reason the wallpaper was hung in the first place was because the walls are not in great condition. I was concerned that after taking the wallpaper down I would probably have to skim coat and sand the walls to ensure an even and smooth surface.  This would be a pain.

2) Removing wallpaper is not always an easy task.  Sometimes the paper comes down in sheets and sometimes it doesn't.  And since I am pregnant and have no experience with this I decided not to go there.

3) Time and Money.  I wanted to get this done before the baby comes and since we're moving in the near future, I didn't want to waste too much time or money removing the wallpaper, sanding walls, etc. 

You get the picture.  So, how do you paint over wallpaper?  Well, here is a good tutorial that I followed, but I will give you a quick run down of how I went about it. 

1) Identify all the visible edges, as well as any loose/peeling wallpaper.  With a razor, carefully trim back any loose pieces.  See the seams below.


2) Next, put just a little joint compound (the mud used at joints in drywall) on any uneven spots - so this means all seams, edges, and places where loose wallpaper was removed.  This is the most important part, since you want the surface to be as smooth as possible before painting.

I had our painter do this and the key to having a seamless look is to ensure that the compound is "feathered" out properly (so the seam disappears).  If it is visible or bumpy, you'll need to sand it more.  Use 150 grit sandpaper or finer.


3) Once the compound is dry and sanded, you will need to prime over the wallpaper.  You need to use an oil based primer.  This is critical because the glue holding the wallpaper onto the wall is activated by water.  Putting latex (water based) paint on will just cause the wallpaper to fall off the wall, which is what we're trying to avoid.  Also, the primer is also the first step to hiding the wallpaper pattern, so it doesn't show through the top coat.  Oil based paint stinks ... so ventilate the area well.  

4) Now, you are ready to paint your walls.  The painter used two coats of latex paint (eggshell finish) and voila!


So that's it ... I love the new color (BM White Down).  It's just so much more airy and open.